


There are a few ways to add child nodes to a Linksys Mesh router that supports the new LinksysNOW web interface, such as the following models:
- Linksys SPNM62
- Linksys SPNM60
- Linksys LN1600 series (LN1601, LN1602, LN1603)
Before you begin:
- Parent router: The parent router is the Linksys Mesh router that connects to your modem. The parent router must be set up and online. If you haven’t set up the parent router yet, the initial setup wizard offers an option to add a child node at the same time. Follow these steps for initial setup instructions.
- Child node: An additional node to extend your WiFi network.
- If you have more than one child node to add, you can add them all at the same time.
- Unable to add a child node?
- If possible, bring the child node closer to the parent router and place it in the same room.
- Do you have the Instant-Privacy feature turned ON? If so, turn it OFF, try adding your child node again, and then turn it back ON once the setup is complete.
- If the DFS feature is turned ON, try turning it OFF first. Then, add the child node and turn the feature back ON.
- To disable DFS, log in to the router's web interface. Go to Menu > Incredible-WiFi. Click on Advanced and then toggle the switch to disable the Dynamic Frequency Selection feature. Click Save.
We have several methods to use when adding a child node. It is recommended to use the Quick and Easy method. We offer other alternative options if you want to use the web interface instead.
Adding a wireless child node using the Pair button (Quick and Easy)
Adding a wireless child node using the web interface (My Network tile)
Adding a wireless child node using the web interface (Instant-Topology)
Adding a wired child node (Quick and Easy)
Adding a wired child node using the web interface
Adding a wireless child node using the Pair button (Quick and Easy)
An easy and quick method to wirelessly connect child nodes. Before you begin, make sure your parent router is set up and online.
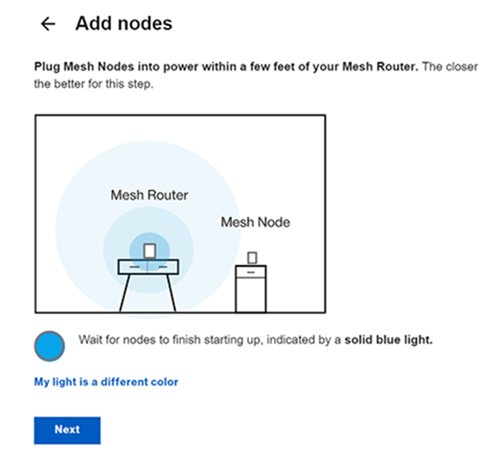
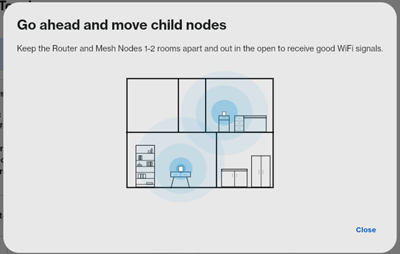
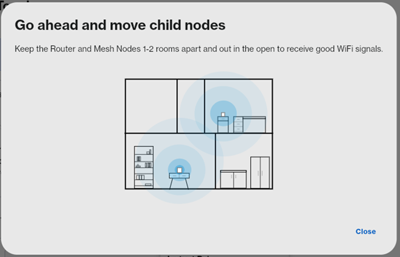
1. Power ON the new child node/s near the parent router. You can move the child node after setup is complete.
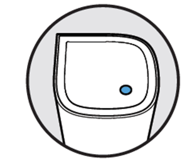
2. Wait for the child node to show a solid blue light.

Solid Blue - Ready for setup
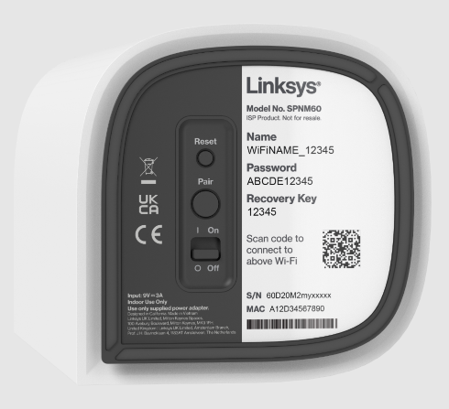
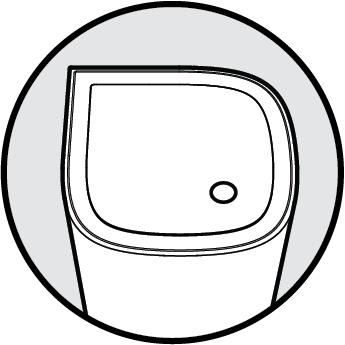
If the child node has a red light, hold down the reset button for about 20 seconds and wait for it to have a solid blue light.
3. Press the Pair button on the bottom of the parent router connected to your modem for at least 3 seconds. The router will begin scanning for unconfigured nodes.
4. The child node’s light will turn solid white once it has been successfully added to the network; this may take a few seconds. Once the light is solid white, you can now move your child node.

Solid white light - The child node is connected and ready
Adding a wireless child node using the web interface (My Network tile)
Before you begin, make sure your parent router is set up and online.
1. Connect your computer or mobile device to the Linksys WiFi network.
2. Power ON the child node/s near the parent router during setup. Wait for the light to turn solid blue on the new child node.

Solid Blue - Ready for setup
Red light? Hold down the reset button for about 10 seconds to restore the router to factory defaults. Wait until the light turns solid blue.
3. Open a web browser and log in to the router's web interface.
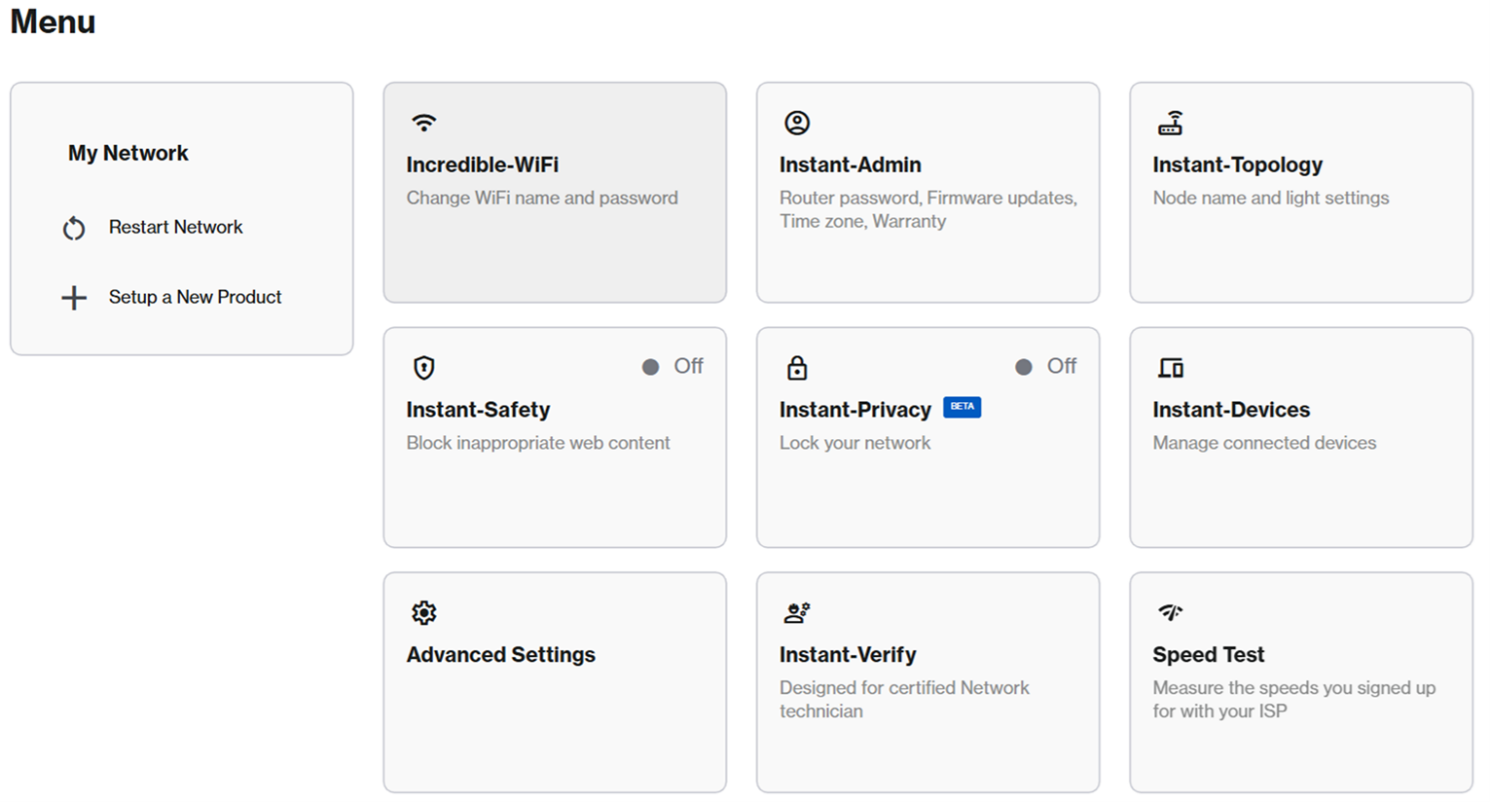
4. Click on the Menu, then click on Setup a New Product in the My Network tile.
5. Make sure your new child node has a solid blue light. Click Next.
The light on the parent router will begin blinking, indicating that the router is scanning for unconfigured nodes. Please wait. This can take a few minutes.
The light on the child node will begin blinking once it has been detected. A solid white light indicates that the node has been successfully added to your network.

Ready
6. Your new child node will be displayed on the list. Click Next.
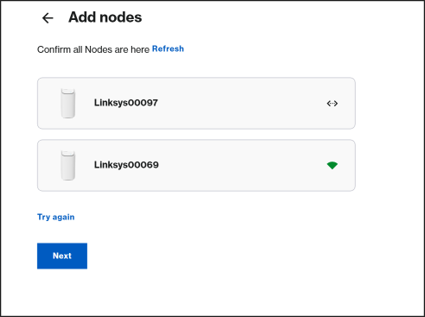
Not seeing the new child node?
- If the light on the new node is still blinking white, wait until it becomes solid white, then click Refresh.
- If the list did not detect your new node, but the light is solid white on the node, click Refresh. If you still don’t see it, click Next and check if your child node appears on the Home page > My Network tile. Sometimes it may take a bit longer to appear on the list. You can view all your connected nodes on the LinksysNOW Home page.
- If the light on the new child node is still solid blue, this means the router did not detect it. Bring the child node closer to the parent node and click Try again or try using the Pair button method.
7. Click Close. You can now move your child node to another location. Once the light is back to solid white, it is ready to use.
Adding a wireless child node using the web interface (Instant-Topology)
1. Connect your computer or mobile device to the Linksys WiFi network.
2. Power ON the child node/s near the parent router during setup. Wait for the light on the new child node to turn solid blue.

Solid Blue - Ready for setup
Red light? Hold down the reset button for about 10 seconds to restore the router to factory defaults. Wait until the light turns solid blue.
3. Open a desktop browser and log in to the router's web interface.
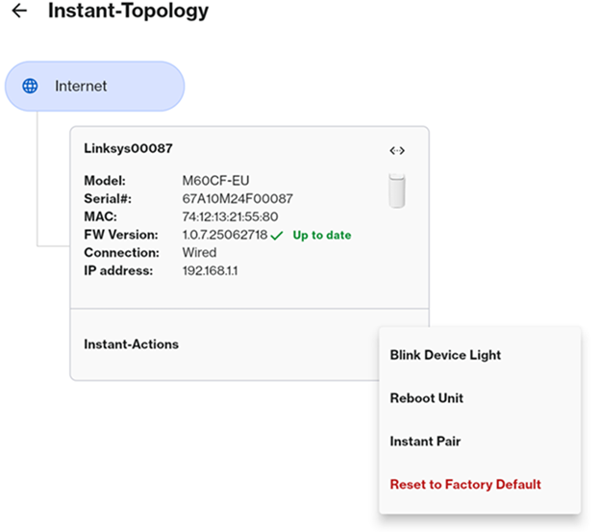
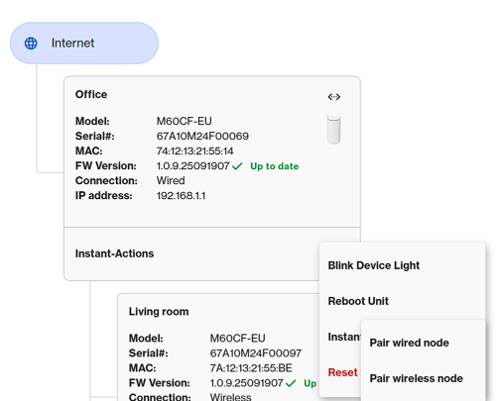
4. Click on Menu, then click on the Instant-Topology tile.

5. The first router on the list is your parent node. Click on the  icon to access Instant-Actions, click on Instant Pair, then click on Reset to Factory Default.
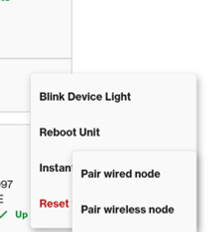
For models SPNM60 and SPNM62, click Instant Pair > Pair wireless node.
6. Make sure your child node has a solid blue light, and click Next.

7. The light on the parent router will begin blinking, indicating that the router is scanning for unconfigured nodes. Once a child node is detected, the child light will also begin blinking. Please wait. This can take a few minutes.
8. Once the child has a solid white light, this means it has successfully been added to your network.

Ready
Your new node will be displayed in the list. Click Next.

Not seeing the new child node?
- If the light on the new node is still blinking white, wait until it becomes solid white, then click Refresh.
- If the light is solid white, click Next and check if your child node appears on the Home page. You can view all your connected nodes on the LinksysNOW Home page.
- If the light on the new child node is still solid blue, this means the router did not detect it. Bring the child node closer and click on Try again, or try using the Pair button method.
9. You can now relocate the child node. Click Close.
*Images may vary by model.
Adding wired child nodes is easy. You can do it in two ways, depending on the status of the child node or parent router.
Before you begin:
- Make sure that the parent router is set up and online.
A. Quick and Easy method
By default, Auto-Wired onboarding is enabled, and by wiring a child node to the parent router, it will automatically add the new child node.
This method can be used in the following scenarios:
- You are adding a new child node (factory default)
- You have an existing wireless child node in your network, but now you want to make it wired.
NOTE: If this method is not working, use the option through the web interface; it’s possible that Auto-Wired onboarding has been turned off.
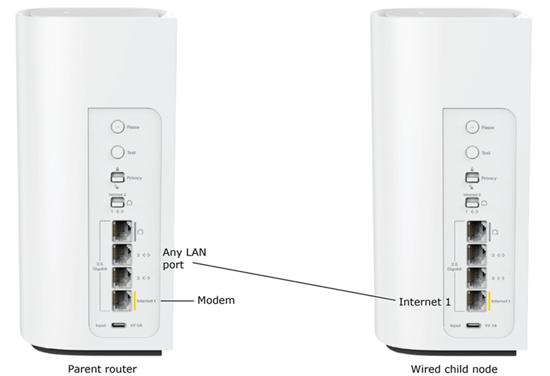
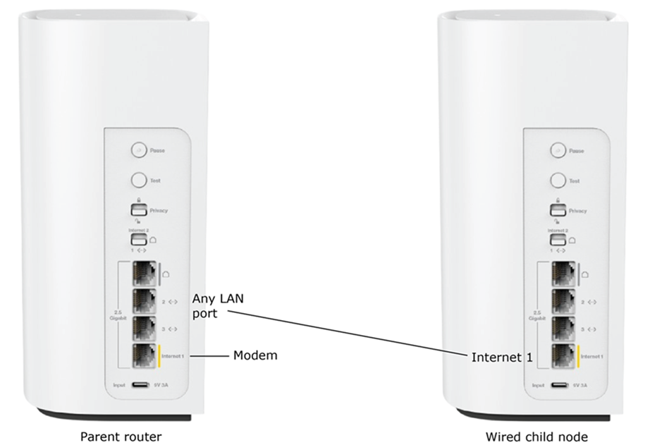
1. Connect an Ethernet cable from the Internet port of the child node to a LAN port on the parent router.
If you are connecting an existing wireless child node, the node is already a child; just connect it from any port on the wired child node.
(Factory Defaults)
2. Once the new child node is detected, the light will start blinking; this may take a few minutes.
3. When the light turns solid white, the node has been successfully added as a wired child node.
Ready
NOTE: If option A does not work, proceed with option B to add the wired child node.
B. Using the web interface
NOTE: If your child's node is already wireless with a solid white light, use Method A. In these steps, it is assumed your child node is on factory defaults.
1. Power ON the new child node. Wait for the light to turn solid blue, which indicates it’s ready for setup.
Solid Blue - Ready for setup
NOTE: If the child node has a red light, hold the reset button for about 20 seconds, then wait until it’s solid blue to continue.
2. Open a desktop browser and log in to the router's web interface.
3. Click on Menu, then click on the Instant-Topology tile.

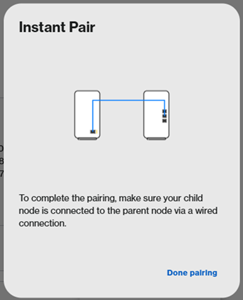
4. The first router on the list is your parent node. Click on its  icon to access Instant-Actions, then click on Instant Pair > Pair wired node.
5. Connect an Ethernet cable from the child node’s Internet port to any LAN port on the parent router.
6. The child node’s light will start blinking white (pairing in progress). This may take a few minutes.

7. Once the light turns solid white, the setup is complete. Click Done.
Ready

