

Setting up your Linksys Max-Stream Tri-Band Routers

Setting up your Linksys Max-Stream Tri-Band Routers is made easy using the Smart Setup wizard which is embedded in the router's firmware. This article will guide you in setting up the following routers:
- Linksys EA8300 Max-Stream AC2200 Tri-Band WiFi Router
- Linksys EA8250 Max-Stream AC2150 Tri-Band WiFi 5 Router
Before you begin:
- Make sure you have a working internet connection.
- If you are replacing your existing router, make sure to disconnect it and move it out of the way.
- Power OFF your modem and connect the ethernet cable from the modem to the internet port of the router. Then, power ON the modem.
- Connect the power adapter to the router and turn it ON.
- Wait until the Linksys logo light is solid.
1. Connect a wireless computer, tablet, or smartphone to the default Wi-Fi of your router. The Wi-Fi credentials are located on a label at the bottom of the device.
If you need to set up the router using a hardwired computer, connect your computer to one of the numbered ethernet ports at the back of the router.
2. Open a web browser and enter “http://LinksysSmartWifi.com” in the Address bar then press [Enter]. You can also use “myrouter.local” or “http://192.168.1.1” (the default IP address of the router).
If you encounter problems accessing the addresses above, make sure the requirements above are met. If the issues persist, you might need to reset your router to factory defaults. Do this by pressing and holding the reset button until the Linksys logo turns OFF.
3. Check the box beside I have read and accepted the License Terms for using this software. Click Next.

Open the link to read the License Terms and other information. If you prefer to manually set up the router, click on Manual configuration.
4. The setup wizard will start to check your router and internet connection.
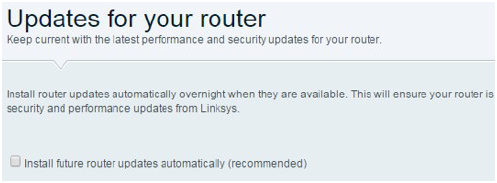
5. Updates for your router are enabled by default to allow automatic updates in the future. You can disable or enable this option later in the Connectivity Tool of the router's web-based setup page. Click Next.
6. Enter your Wi-Fi Name and Wi-Fi Password. These will apply across all three bands. Click Next.
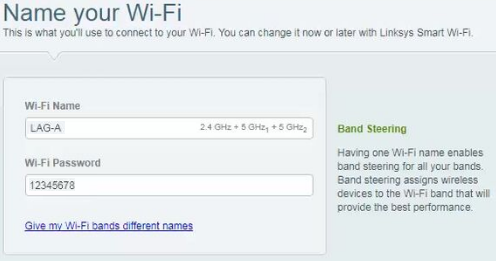
If you need to create unique names for each of your 2.4 GHz and 5 GHz bands, click on Give my Wi-Fi bands different names, however, this will disable Band Steering on the 2.4 GHz band. To learn more about the Band Steering options on your router, click here.
7. Connect to your Wi-Fi. Now that your router has a new Wi-Fi name and password, you will need to connect your wireless device to your new Wi-Fi to continue with the setup. Click Next.
If you are using a wired computer, the setup wizard will proceed to the next step.
8. Create a router password and an optional password hint and then click Next.
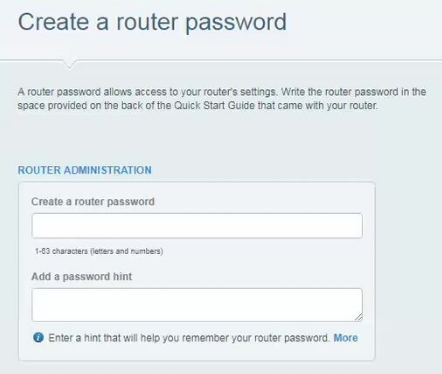
This is your router’s local administrator password.
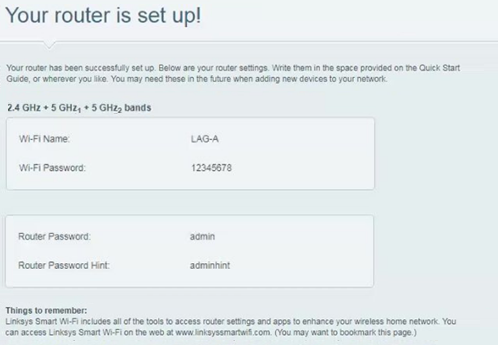
9. Your router is set up! On this screen, you will see all your current router settings. Write them down or print out this page for future use. Click Next.
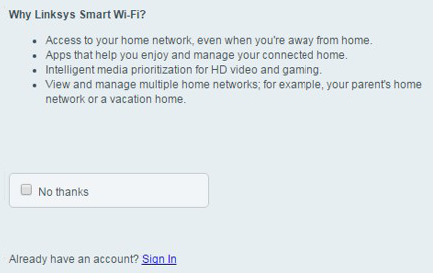
10. Create your Linksys cloud account or click Sign In if you already have an account or click No thanks to skip this step.
Skipping this step means you can only log in to the router locally, you will not be able to log in remotely without a Linksys cloud account. If you skip this step, you can always create an account later. For instructions, click here.

