


The Connectivity Tool in the Linksys Smart WiFi web interface allows you to manage your router's essential settings. This article provides a general overview of the Connectivity Tool and basic descriptions of each tab. For step-by-step configuration instructions, use the linked articles in each section.
Use this tool if you need to:
- Change your WiFi name and password
- Update the router administrator password
- Set your internet connection type
- Configure advanced DHCP or VLAN settings
1. Launch a web browser.
2. In the Address bar, enter your router’s IP address or “myrouter.local” then press [Enter].


The default IP address of the router is 192.168.1.1. If you changed it, enter the new IP address instead.
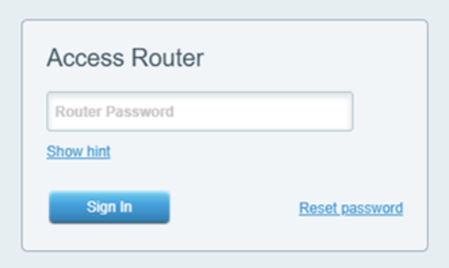
3. Enter your Router Password and click Sign In.
If you forgot your password, click on Reset password and follow these steps.
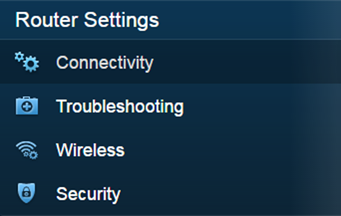
4. Under the Router Settings menu, click on Connectivity.
5. Configure the Connectivity Tool according to your preference.
There are six tabs found in the Connectivity Tool, namely:

The Basic tab allows you to view and change the router settings.
1. Router Password
What it does:
This section allows you to change the router password, which is used to access the router settings and features such as Guest Access and Parental Controls.
When to change it:
Change it during the initial setup to replace the default factory password, or anytime you suspect your network security has been compromised.
What to watch out for:
Do not confuse this with your WiFi password; losing it requires a reset. Follow these instructions on how to change the router password.
2. Router Firmware Update
What it does:
Keeps your router's internal software updated automatically or manually.
When to change it:
Keep Automatic checked for hands-off protection. If you unselect Automatic, available updates will only be installed when you click the Check for Updates button. Only trigger a manual update if a critical security patch is released or if directed by tech support.
What to watch out for:
Never unplug or power OFF the router during an active update. Doing so can permanently corrupt ("brick") the device and render it completely unusable.
3. Time Zone
What it does:
Synchronizes your router's internal clock with the exact time standards for your geographical region and automatically manages transitions for Daylight Saving Time (DST).
When to change it:
Adjust this during initial configuration, if you physically relocate the router to a different region, or if scheduled network events are triggering at the wrong times.
What to watch out for:
An incorrect time zone will disrupt time-sensitive automation features, causing parental control internet blocks, guest network access windows, and automated firmware update schedules to execute hours too early or too late.
4. Activity Lights
What it does:
Allows you to set the router port lights ON or OFF.
When to change it:
Turn them OFF if the blinking lights are a visual distraction in a bedroom, home theater, or workspace. Leave them ON if you prefer a quick visual confirmation that your physical connections are working.
What to watch out for:
Turning these lights OFF makes troubleshooting harder; you will not be able to tell at a glance if a network cable is loose, disconnected, or failing without logging back into this administrator dashboard.
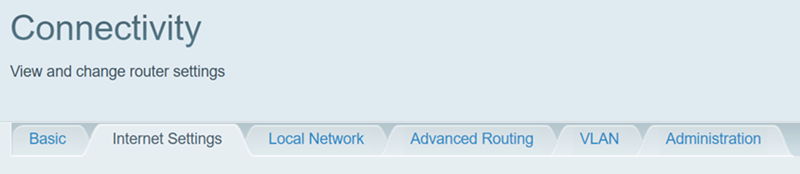
Allows you to configure the router to work with your internet connection. Your router ships with the most common settings, and several settings are configured during setup.
You may never have to change any of these settings.
IMPORTANT: If you do need to change these settings, contact your internet service provider (ISP) for assistance.
Settings are available for IPv4 and IPv6.
1. Internet Settings IPv4
Type of Internet Connection
Select the type of internet connection your ISP provides from the drop-down menu.
Quick decision aid:
- Use Automatic Configuration - DHCP for most home users.
- Use Static IP only if your ISP gave you fixed, permanent IP details.
- Use PPPoE if your ISP provided a specific account username and password.
The different Connection Types are as follows:
- Automatic Configuration - DHCP:
- What it does:
- Automatically requests and receives temporary, dynamic IP address details from your ISP.
- When to change it:
- Select this standard option during initial setup if your ISP does not require special login credentials or fixed IP numbers.
- What to watch out for:
- Your public IP address will occasionally cycle and change automatically, which is normal for standard home internet packages.
- What it does:
- Static IP: Follow these instructions to learn how to configure your router with a static IP.
- What it does:
- Manually assigns a permanent, unchanging IP address and routing details to your internet connection.
- When to change it:
- Use this only if you pay for a dedicated business line or if your ISP explicitly mandates manual IP entry.
- What to watch out for:
- Typos in your subnet mask, default gateway, or DNS entries will completely block your network from accessing the internet.
- What it does:
- PPPoE:
- What it does:
- Establishes a secure connection to your ISP using an account verification framework via a specific username and password.
- When to change it:
- Select this if you use Digital Subscriber Line (DSL) internet or an ISP that requires a login to authenticate your monthly subscription.
- What to watch out for:
- Forgetting or misspelling your ISP credentials will result in an immediate connection failure; contact your ISP if you lose your login details.
- What it does:
- PPTP:
- What it does:
- Routes your internet connection through an integrated Point-to-Point Tunneling Protocol tunnel to secure data transfers.
- When to change it:
- Select this if your specific service provider uses PPTP encapsulation to establish and manage your main wide-area network connection.
- What to watch out for:
- PPTP is an older, weaker security protocol; do not use it unless your ISP explicitly instructs you to do so.
- What it does:
- L2TP:
- What it does:
- Combines Layer 2 Forwarding and PPTP features to tunnel your primary internet connection data safely.
- When to change it:
- Use this option if your regional ISP uses Layer 2 Tunneling Protocol infrastructure to handle account access.
- What to watch out for:
- This mode adds encryption overhead, which can slightly reduce your maximum raw internet speeds compared to standard DHCP.
- What it does:
- Bridge Mode:
- What it does:
- Disables the router's internal routing, firewall, and parental control features, turning it into a basic access point.
- When to change it:
- Select this if you are connecting this router directly into an existing modem-router combo unit provided by your ISP.
- What to watch out for:
- Turning this on disables your network's primary layer of security; your secondary devices will now rely entirely on your main gateway for IP assignments.
NOTE: Some Linksys Smart WiFi Routers support Wireless Repeater and Wireless Bridge modes.
- Turning this on disables your network's primary layer of security; your secondary devices will now rely entirely on your main gateway for IP assignments.
- What it does:
Optional Settings
These are optional settings you can configure on your router.
- Domain name: This displays the domain name for the router. Some ISPs, usually cable ISPs, require this as identification. You may have to check with your ISP to see if your broadband internet service has been configured with a domain name.
- Maximum Transmission Unit (MTU): Specifies the largest packet size permitted for internet transmission. Select Manual if you want to enter the largest packet size that is transmitted manually. To have the router select the best MTU for your internet connection, keep the default setting to Auto.
- MAC Address Clone: Provides the option to use the same MAC address for your computer or router and not get a new one from your ISP.
2. Internet Settings IPv6
IPv6 is the "next generation" Internet Protocol (IP) standard. It replaces IPv4, the Internet Protocol currently used most extensively throughout the world. IPv6 supports a much larger address space and helps to enable new types of applications for communication and collaboration.
IMPORTANT: Leave this on IPv6 Automatic unless your ISP has provided you with specific custom tunnel configurations.
Type of Internet Connection
Select the type of internet connection your ISP provides from the drop-down menu.
The available types are:
- IPv6 Automatic: Select this to use native IPv6.
- DUID: The device user identification assigned by the router.
- 6rd tunnel: Select this to use 6rd tunnel.
- Prefix: The prefix address used for the tunnel, provided by your ISP.
- Prefix length: The prefix length used for the tunnel.
- Border relay: The border relay address used for the tunnel.
- IPv4 mask length: The IPv4 Address mask length used for the tunnel.
Optional Settings
These are optional settings you can configure on your router.
- Domain name: This displays the domain name for the router. Some ISPs, usually cable ISPs, require this as identification. You may have to check with your ISP to see if your broadband internet service has been configured with a domain name.
- Maximum Transmission Unit (MTU): Specifies the largest packet size permitted for internet transmission. Select Manual if you want to enter the largest packet size that is transmitted manually. To have the router select the best MTU for your internet connection, keep the default setting to Auto.
- MAC Address Clone: Provides the option to use the same MAC Address for your computer or router and not get a new one from your ISP.
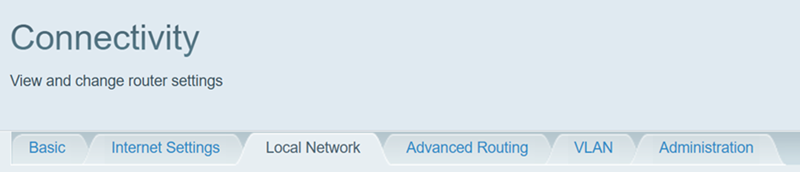
Allows you to configure the router to work with your internet connection.
1. Router Details
IP address: This is the router's IP address.
Quick Tip: You may be able to change this address, but you will have to reconnect devices currently connected to your router. Follow these instructions to learn how to change the router's IP address via the web interface.
Subnet Mask: This is the router's subnet mask. It's used to divide a network into subnets so information can be routed correctly to your computers and devices. Your ISP will provide you with the subnet mask setting needed here.
2. DHCP Server
Dynamic Host Configuration Protocol (DHCP) is enabled by default on your router. DHCP assigns IP addresses to computers and devices on your network as needed.
- Start IP address: This is the starting IP address given to the first device that connects to the network.
- Maximum number of users: This is the total number of devices that can connect to your router. This number can't be greater than 253, and its default is 50.
- IP address range: The available IP addresses that can be used on the network.
- Client lease time: The amount of time (in minutes) a network user is allowed to connect to the router with their current IP address. When the time has expired, the user will be automatically assigned a new IP address, or the lease will be renewed.
- Static DNS 1-3: Domain Name System (DNS) is how the internet translates a domain or website name into an internet address or URL that you can access. Your ISP will provide at least one DNS server IP address. You can enter up to three.
- WINS: The Windows Internet Name Service (WINS) is responsible for managing each computer's interaction with the internet. If you use a WINS server, enter that server's IP address here. Otherwise, leave this blank.
- DHCP Reservations: This is where you can assign a unique, fixed IP address to a specific device on your network. This is helpful when you want your device to have the same IP address every time it connects to the network. Follow these instructions to learn how to configure DHCP reservations.
- NAT: Network Address Translation (NAT) allows the router to modify packets to allow multiple devices to share a single IP address. Select this option to enable NAT.
- Dynamic Routing: The Dynamic Routing feature can be used to automatically adjust to physical changes in the network's layout. The router uses a dynamic RIP protocol. It determines the route that the network packets take based on the fewest number of hops between the source and the destination. The RIP protocol regularly broadcasts routing information to other routers on the network.
- Static Routing: Use this option to assign a specific IP address, subnet mask, and gateway address to a specific device. To add a route, click the Add static route button, then enter the device name and the information to use for that device, and click Save. To change information for a device, click Edit.
NOTE: Only the latest Linksys Smart WiFi Routers support this feature.
To establish a connection to the internet, some ISPs require a virtual LAN (VLAN) to be enabled on your router. Follow these instructions to learn how you can configure the VLAN settings.
1. Local Management Access
- HTTP/HTTPS: Use HTTP only, or select HTTPS to also use Secure Socket Layer (SSL) to encrypt data transmitted for higher security. Both HTTP and HTTPS are selected by default.
- Access via wireless: Select this to allow wireless access to your network.
2. UPnP
Universal Plug and Play (UPnP) allows devices connected to a network to discover each other and automatically create working configurations. Examples of UPnP-capable devices include web cameras, online gaming applications, and VoIP devices. UPnP is enabled by default.
Select whether to allow users to change router settings or disable your local internet connection while using UPnP.
3. Application Layer Gateway
Select this to allow Session Initiation Protocol (SIP) packets. This is used by some VoIP service providers to go through your router's firewall.
4. Express Forwarding
Enabling the Express Forwarding feature can increase router performance as it bypasses protocols that add extra overhead to router processing, such as packet-level inspections, sorting, filtering, and queuing.
NOTE: This feature is not available on some models.
5. AllJoyn Notifications
AllJoyn® is an open, secure technology that allows AllJoyn-enabled devices on your network to discover, connect, and interact directly with each other.
If you turn ON the notifications, your router will send notifications to AllJoyn-enabled devices on your network whenever a device is connected. The ability to receive the notifications and the notifications utility will be dependent on each device’s configuration and software capability.
NOTE: This feature is only available on the Linksys EA7500 model.

